We’ve all heard the phrase “Brewers make wort, yeast makes beer.” So how do you make sure that the yeast takes the same care with your wort as you do? There are several answers to that question, depending on your yeast and your desired outcome.
 With dry yeast, the straightforward answer is to rehydrate. Simply take some fresh, lukewarm water and sprinkle the packet of yeast into it. Try allowing it to rehydrate for about 15 minutes before pitching. Provided you have a reasonably fresh packet, this is all you need.
When working with liquid yeast, your best bet is to use a starter. This is similar to the way the Wyeast smack packs work. A starter is used to build up the number of live yeast cells to a pitchable quantity. The cell count to aim for depends on the style you’re making, between 0.75 million cells per millilitre per degree plato for ales and 1.5 million for lagers. See http://www.brewersfriend.com/plato-to-sg-conversion-chart/ for conversion from specific gravity to plato.
The procedure for making a starter is essentially making a small batch of beer. The process I’ve found to work for me is as follows:
- Measure out the water for the starter. From a new smack pack or vial(100B cells) use a 2L starter. For lower cell counts or old yeast, it’s better to start with a smaller starter.
- Weigh out the malt extract to make a thin wort with a specific gravity of approximately 1.040, roughly 100g/L . This doesn’t have to be exact, but we don’t want to stress the yeast with a monster fermentation. Our goal is reproduction, not beer.
- Heat the water, and whisk in the dry extract. Continue to heat and bring this to a boil. Starter wort is susceptible to boil over, so use caution to avoid a sticky mess.
- After a 15 minute boil, cool the wort to room temperature and transfer it to a sanitized vessel for fermentation.
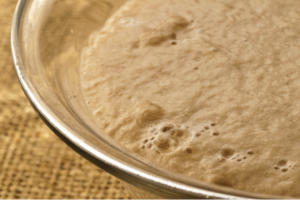
- Oxygenate the wort as well as you can by shaking or using an air stone, then pitch the yeast
- Cover with a piece of sanitized foil and put the vessel in a warm place.
If you did a 2L starter with a fresh pack, when the wort is fully fermented you will have doubled your cell count. I like to do my starters a couple of days ahead of time so I can crash it in the fridge for at least a day. This lets me decant the bad beer off the top of the yeast cake, and pitch only the yeast slurry.
A few tips and tricks that can help streamline things and make sure the starter is most effective:
- When you mix the extract with the water, you can add some yeast nutrient. This just ensures that the yeast has all the food it needs to make more cells.
- Defoaming agents are helpful to avoid boil over and spills due to fermentation. Use these as suggested by the label.
- For my starters, I use erlenmeyer flasks. The lab grade glassware makes it possible to boil, chill, and pitch all in the same vessel. If you are boiling in the flask, the above mentioned defoaming agent is highly recommended.
After all that, you may ask “why does it matter how much yeast I have? Doesn’t it just reproduce in my beer?” The answer to the second question is technically yes. The reason you want to make sure you have enough is a matter of giving the yeast a head start at being the dominant organism. The longer it takes to get going, the higher the chance of infection. Underpitching can also stress the yeast which has the possibility of causing off flavours.
Overpitching can be a problem as well, mostly in beers that rely on yeast for a large portion of their flavour profile, such as saisons and hefeweizens. The esters and phenols we get from the yeast are a product of the reproduction process. If you add too much at the start, those compounds don’t have a chance to develop.
A final parting tip is to make a starter that is larger than you need for your brew. This lets you reserve some of the starter for another batch later on. It avoids the problems associated with yeast washing, and you can be sure you have clean yeast. Just make a starter from the harvested portion for the next brew.
Happy brewing!
Jesse Witozskin
Leave a Reply